
Before you start handling the FreeWing, please read this ‘Getting Started with the FreeWing’ user guide carefully and follow the instructions & recommendations. Try to get yourself as familiar as possible with the Wing and all its components, what they are made for and how to set it up correctly.
Setting Up:
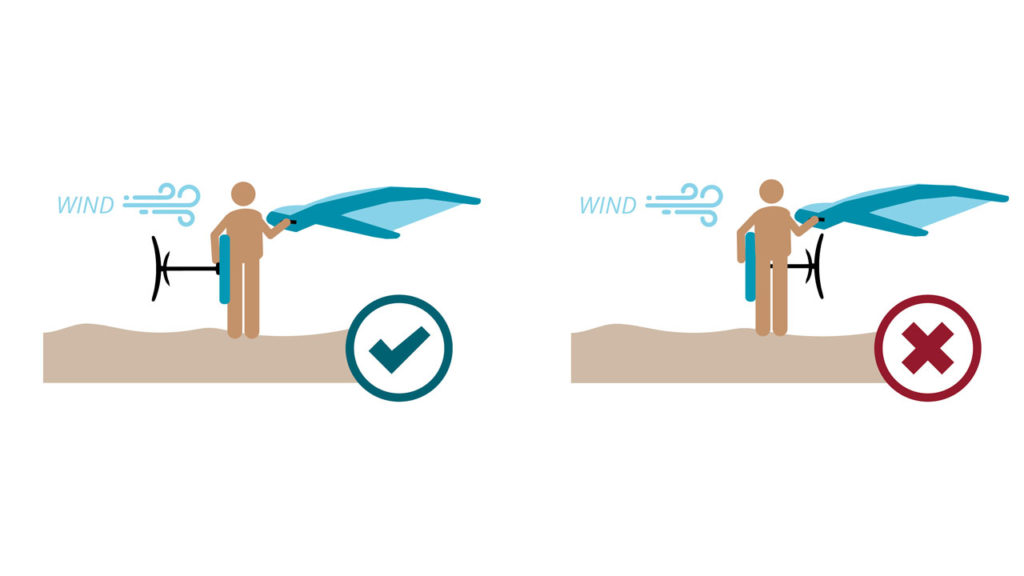
It’s important to rig up your wing in a flat & open area, avoiding sharp objects that can possibly damage the wing. Pay attention to the wind intensity and direction and stand with your back to the wind 180º. Attached the pump rope hook into the leash attachment on the leading edge, you can also attach the leash cuff to any fixpoint, this option is also useful when to stall your wing when you need to depower or take a break, ensuring you always keep an eye on it.
Lay the wing out flat with all the bladders facing up and deflated. While holding the middle section of the wing you must close the pumping valve clockwise, until is secure enough, then unscroll the top plug, counterclockwise to insert the nozzle of the pump into it. Make sure it’s properly inserted so it does not come out when you are adding more pressure.
Ground Stage:
Early steps should be done on the sand or the ground, this is the safest and easiest way to understand how the wing flies and the different positions. Such factors as placing in the neutral position (Zenith), understand the handle positions and how we can control the power, (sheet in and sheet out), steering on the different possible angles (on both tacks), and also practice the letting go of or catching it back from the leash.
These are just some exercises you can start working on and once you feel comfortable and in good control of the wing, are able to make any desired move then you are ready for jumping on the water
Jump on the Water:
At the initial stage, you have to be selective in choosing the right conditions that will make your learning process an enjoyable & pleasant journey. Going out in high or gusty wind conditions could lead to bad experiences, frustrations or even unforeseen accidents.
Always check the weather forecast as well as eye-ball local conditions, paying special attention to the wind intensity, ties and cloudiness. Be sure to always avoid stormy or offshore conditions. Look for locations that have lots of open space away from both obstacles and people, avoiding as many obstacles as possible on the water, avoid currents. Be mindful and be cautious ar river mouths where currents typically are very extreme. The wind strength also becomes extremely relevant according to the size of the sail you have, follow the wind chart recommendations under the product specifications section or in the user guide that came with your FreeWing.
Before entering the water, be sure to carry your board out in the correct and safe manner. The FreeWing’s canopy is extremely fragile and can rip or tear if it gets in contact with the sharp foil setups. You must always hold your wing with the leeward hand positioning the wing windward (downwind) from you. 80% of our focus must go to the board and the foil (while the wing is depowered), always pointing the foil into the wind, windward from you, and get as much space as possible in between the sharp front & back wings of the foil and the inflatable bladder & wing sail.
When entering into the water, there are two main constraints to be fully aware of; first is the type of shorebreak and wave intensity, and secondly is the water depth.
With the board upside down carrying it with the windward (downwind) hand, hold the front wing protecting yourself in case of falling onto it, while carefully moving into deeper water. With the other hand carrying the neutral handle on the FreeWing (leeward) from you, start walking into the water until you chest-deep.
You are now ready to start flying!